Click For Docs:
Overview
How-to
How-to Overview
Deploy Image Algorithm
Deploy Audio Algorithm
Deploy Video Algorithm
Deploy Text Algorithm
Deploy Json Algorithm
Decide on a Server
Use Elastic Inference
Make an iOS App
Website for Algorithm
Use Swagger
Using Algorithm Cloud
API Types
API Types Overview
Image Data Type API's
File Data Type API's
Text Data Type API's
Audio Data Type API's
Video Data Type API's
Arrays Data Type API's
JSON Data Type API's
FAQs
More Resources
Using AWS Elastic Inference
- AWS elastic inference allows you to deploy Tensorflow or MxNet models in a networked GPU only using the amount of GPU RAM required available in 1GB, 2GB, or 4GB sizes that will easily fit deep learning models
- Up to 75% of cost to operate the server is saved when compared to operating a GPU machine. So it is the easy choice when needing fast inference speeds with added GPU hardware.
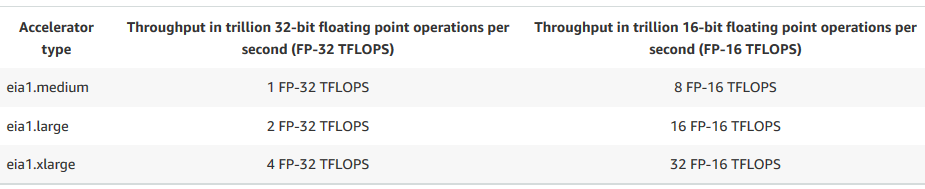
- Shown is the three types of GPU’s added to servers based on GPU memory and the typical throughput of computation
- In this example, we will show how to deploy a Tensorflow Resnet Image Algorithm trained off Coco with Elastic Inference. For other examples on how to use EI, see AWS EI documentation. AWS EI Devleoper Guide
- For the code used: Elastic Infernce Example Repository
Setting Up Algorithm Cloud for EI
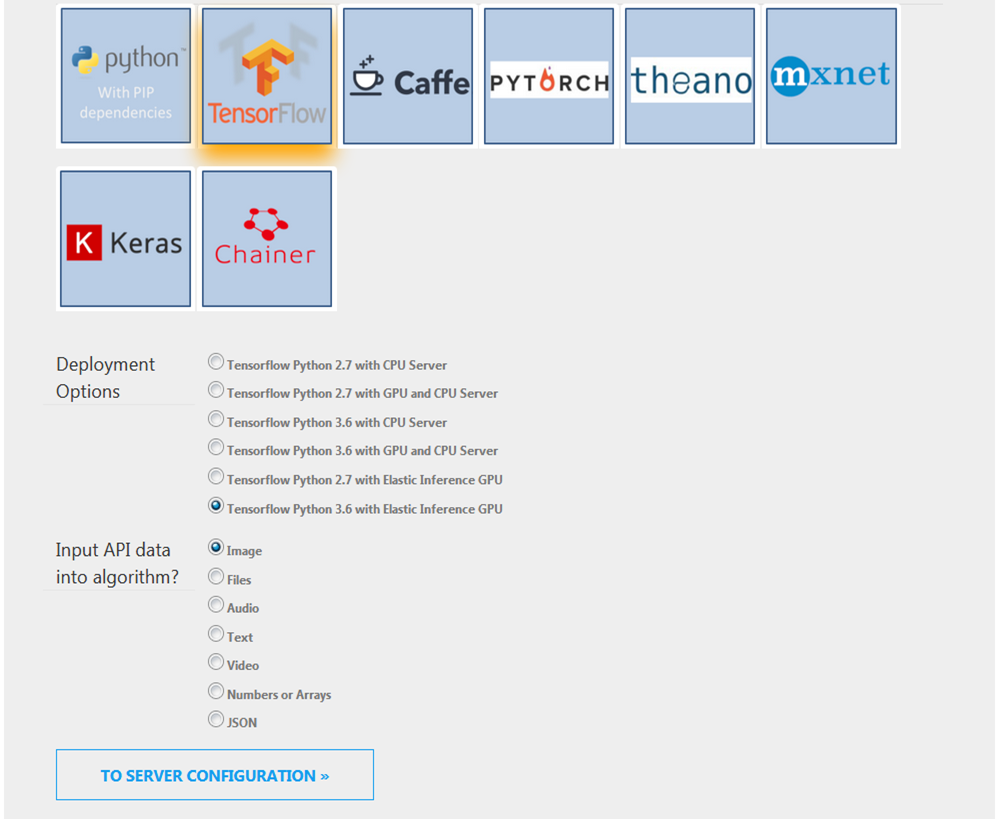
- Shown is how to use elastic inference in the context of deploying an image based classification in Elastic Inference and Tensorflow but mxnet may also be used.
- Select the Tensorflow option.
- Select the Tensorflow Python 3.6 Elastic Inference environment for this example.
- Select image data type
Server and API Selection
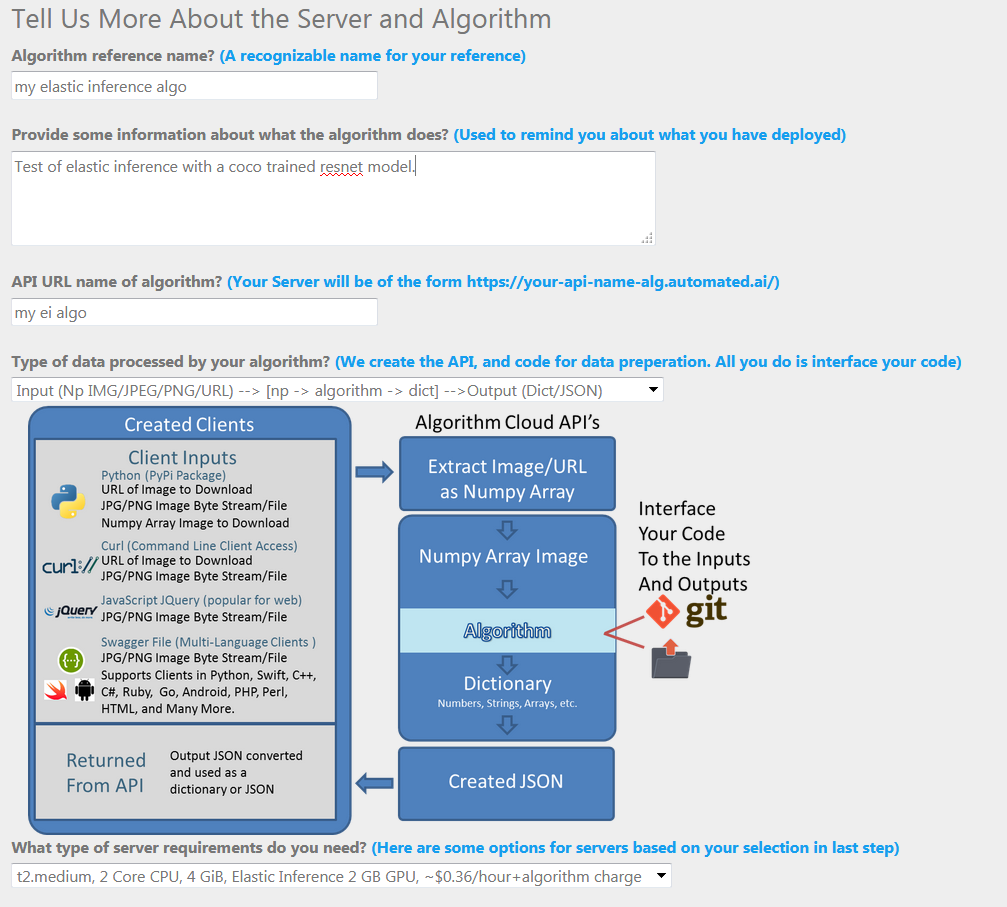
- Name the Algorithm and API.
- Select the data flowing into and out of algorithm. We select the option the receives an image as np array and returns a dict output to return classifications name of the items classified in the image.
- Select server needs and location. In this example we Select t2.medium with 2GB of elastic inference memory as the server used and this will depend on model size needs.
Code Integration
Select and Integrate Code
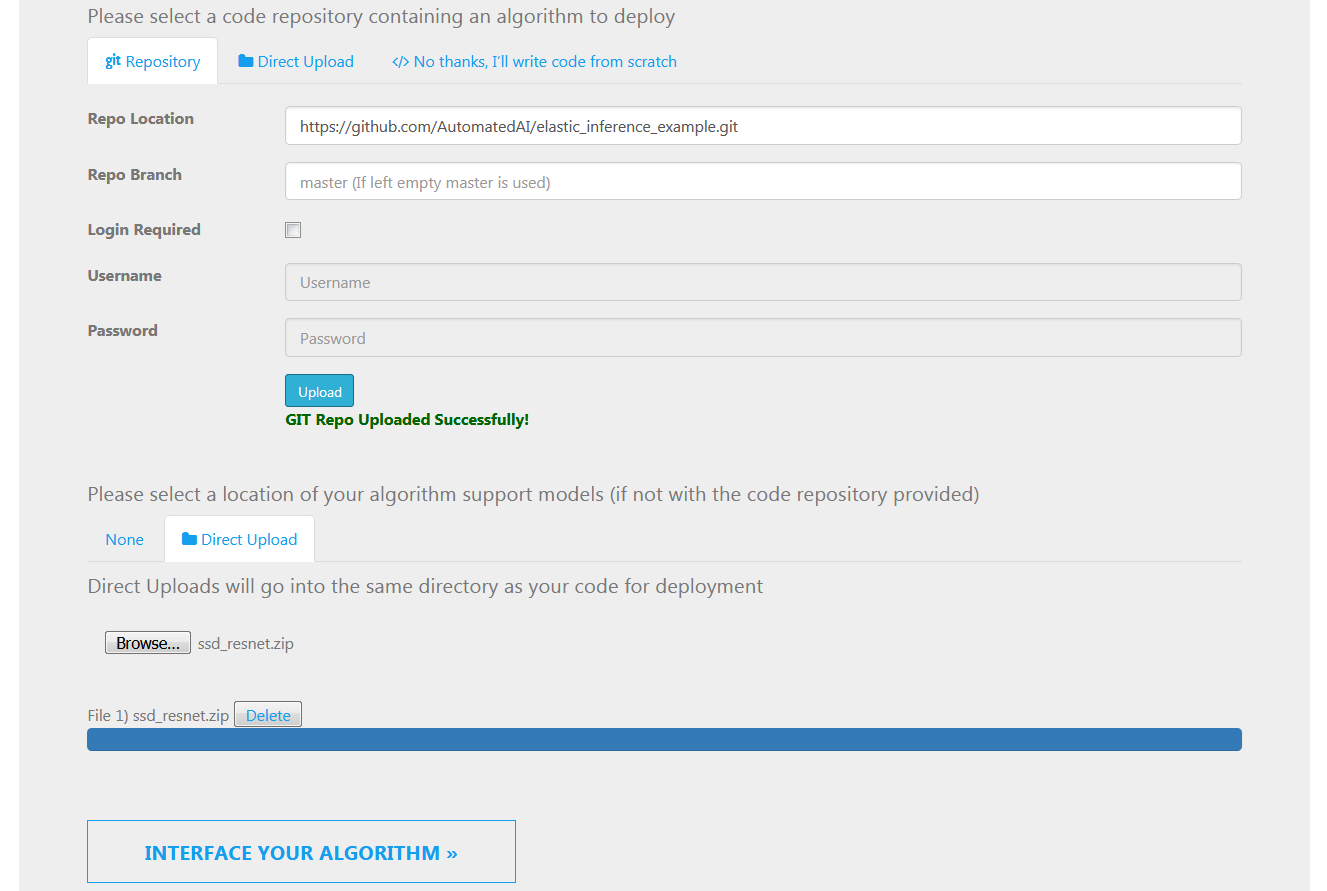
- Select code from GIT or a direct upload: For this example use the repo that contains the elastic inference support code for a Coco resnet model.
- Pull the code from this public repo: https://github.com/AutomatedAI/elastic_inference_example
- Select extra models to add into the repo. In the readme of the repo, specified is how to obtain the model.
- Using CURL, You may use the following command to download the model: curl -O https://s3-us-west-2.amazonaws.com/aws-tf-serving-ei-example/ssd_resnet.zip
- Once downloaded to your system, upload the model by specifying the model path to ssd_resnet.zip on your system.
Using Elastic Inference and Tensorflow
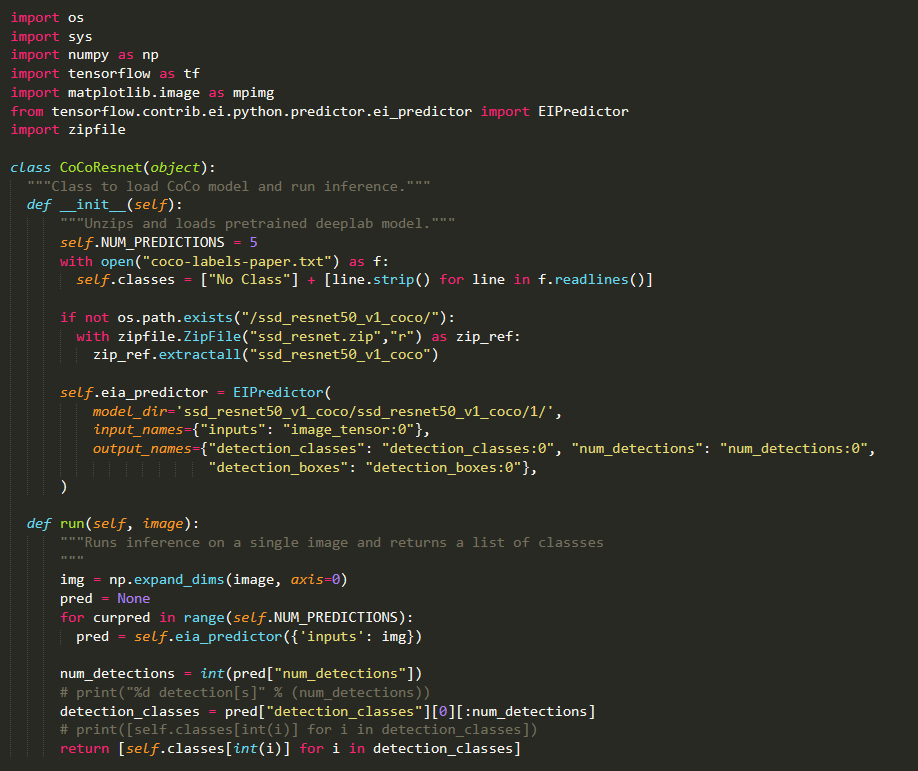
- As a side note before integration of the algorithm to Algorithm Cloud: contained in the repo is ssd_resnet_predictor.py that loads the model into EI and then allows for inference to be performed.
- Normal Tensorflow code cannot be used and specific way of writing code that Elastic inference must be written to load and access the model in EI.
- In this Example, an __init__ method was created to unzip and load the model into EI and a run: method was generated to use the model and provide an image to generate a list of classes.
- When loading a model into Elastic Inference, You have to use the EI predictor Class with the location of the model, and the input and output tensors.
- For more information, see AWS EI Devleoper Guide
- After calling the EIPredictor class to load the model and specified input and output tensors in the Elastic Inference system you can call the ei_predictor class with an image to perform an inference on the image.
Code Integration in aai_main.py
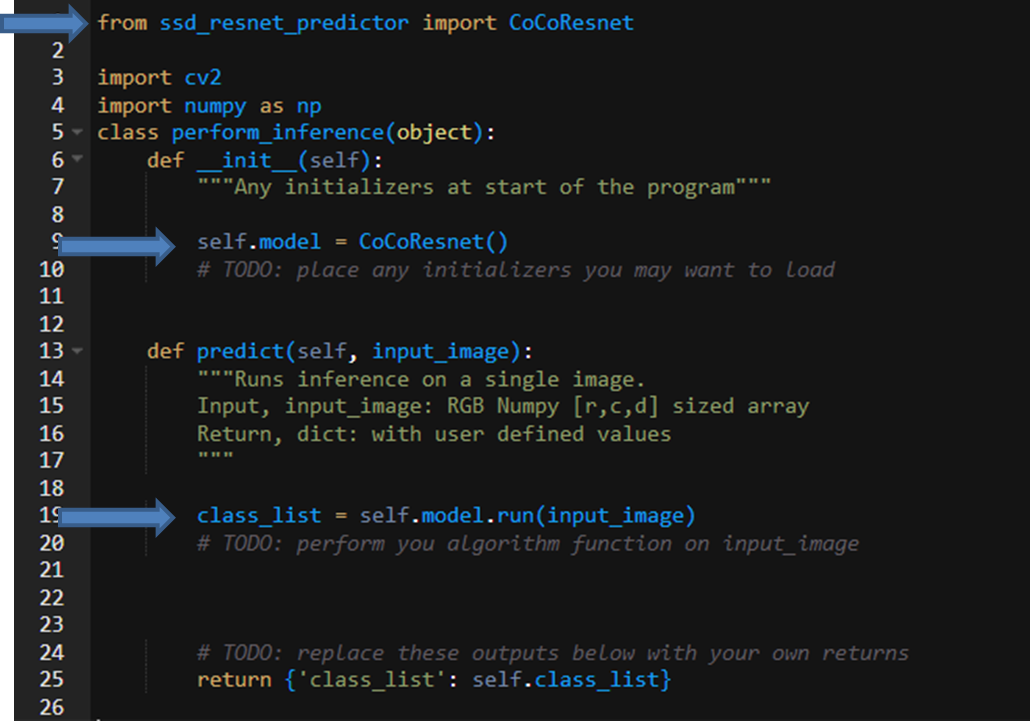
- Add an import to the CoCoResnet() supporting class.
- Add any models or code you want to load at the start of the program in __init__: Initialize the CoCoResnet() to load the model into elastic inference.
- Add any code to process based on inputs and outputs in predict(…): Use the model loaded into elastic inference to run an image inference and get the classes from the prediction.
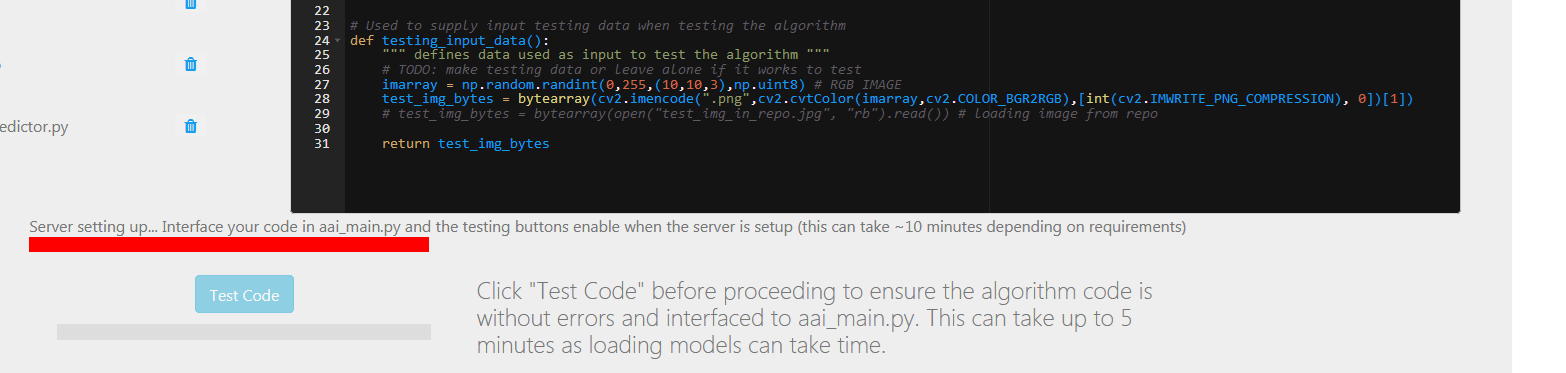
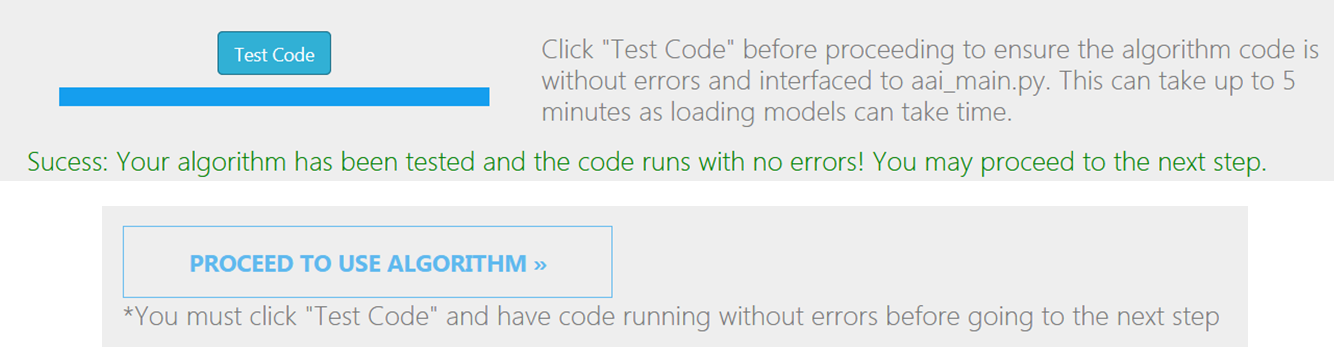
Test Your Code
- Test your code to make sure the API runs. Errors will be reported back.
- Code is tested with the testing_input_data(): function.
- The site will tell you when the server is booted and ready to be tested.
Completion of Testing
Almost ready to deploy your algorithm.
- With Success of “Test Code” you may proceed to using your algorithm.
- Go to the next step to use your algorithm
Using the Algorithm
Algorithm Clients
- Code is auto-generated to use the deployed algorithm with different clients
- Python: Depending on data flowing a variety of ways to input and output the data into and out of the algorithm are generated.
- Curl: Command Line version using the algorithm.
- JQuery: A JavaScript example website is generated to access and use the algorithm.
- Swagger File: Allows for Clients in any language to be generated.
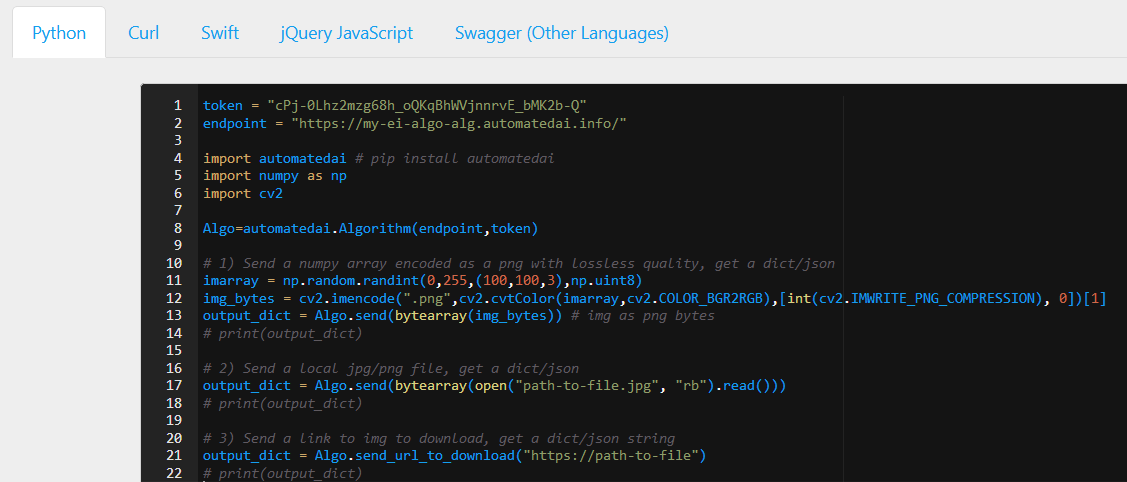
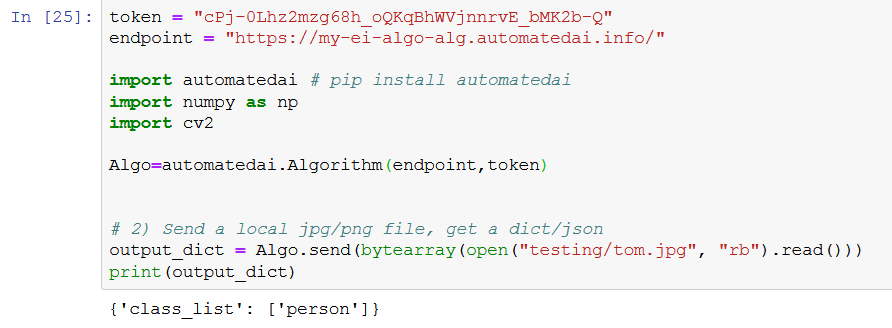
Predicting Image Class with Python
- Using the python Code generated that uses the automated.ai PyPI library (pip install automatedai).
- You can access and use the algorithm with just a few lines of code.
- As can be see the algorithm was used to process an image and return the classes in a list contained in a dictionary/JSON of the names of the items contained in the image.